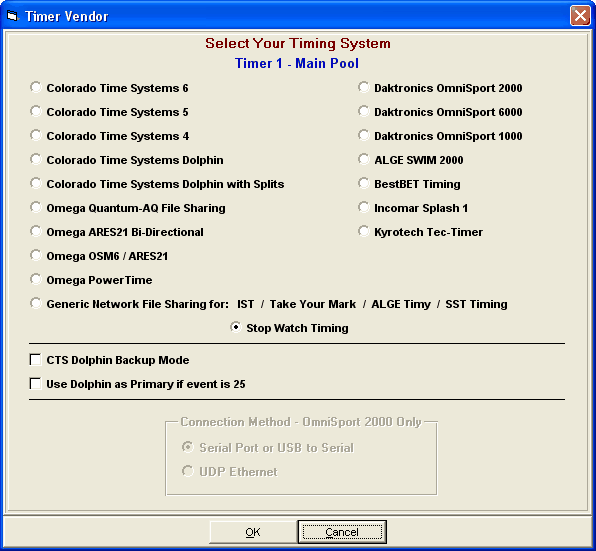
HY-TEK's MEET MANAGER offers the option to Interface with many Timing Consoles. The software module that actually handles the communication with your particular Timing Console is called the Timing Console INTERFACE software.
•If all timing console options in the screen below are greyed out except for Stop Watch Timing, it means you have not purchased the Timing Console Interface. You can purchase the Timing Colsole Interface Online at www.hytek.active.com/store.
•To specify which timing Console INTERFACE software you wish to use for your meet, from the Main Menu bar click Set-up / Timing Console INTERFACE to select the timer from the list below.
•If you are not using a Timing Console for your meet, select Stop Watch Timing and then when you actually Run the meet, MM will calculate the official time from 2 or 3 stop watches that are entered in the three Backup Time columns.
•Most all timers connect to the MEET MANAGER computer using a serial port. Because all computers today are configured without a serial port, you must use a USB to serial adaptor. The default setting for Connection Method below is Serial Port or USB to Serial.
•You can eliminate the need for a USB to serial adaptor with the new Daktronics OmniSport 2000 console which communicates with Meet Manager using a standard network cable. If you select OmniSport 2000 below, you can choose UDP Ethernet radio button under Connection Method below instead of Serial Port or USB to Serial.
Two Timers Connected to One Computer: MM has the ability to connect two timers to one computer for two pool situations. You specify whether you are using two timers or not in the Meet Setup and in the Meet Setup you assign a name to each timer to help identify which timer is associated with a particular pool. If you only setup 1 timer per Meet Manager computer, the timer will be labeled Timer 1, but will still have a name that you assign such as Main Pool shown below.
