Installing TEAM MANAGER using a CD
You install TEAM MANAGER just as you would any Windows product using Windows Installer. From your Windows desktop, click on Start and then Run and key in the CD drive letter and then "setup". For example if your CD is Disk Drive D, enter D:Setup.
NOTE: If you have the Windows AutoRun turned on, Windows will automatically read the CD and begin the installation process.
NOTE: If you are a TEAM MANAGER 2.0, 3.0, or 4.0 Customer, there is no need to Remove TFTM 2.0, TFTM 3.0, or TFTM 4.0 in order to install TFTM 4.1 as long as you use the default installation directory name shown below.
The TEAM MANAGER Installation software will guide you through the installation process. When asked for a directory/folder name to use, We recommend that you use the default installation folder/directory name of "Hy-Sport\TFTM4-1".
Read the License File From the CD
After Windows has completed its restart, re-insert the CD (if you have removed it) and cancel at the first opportunity if it starts to install again. Click on the TEAM MANAGER icon on your Windows desktop. The first thing that TEAM MANAGER will do the very first time it is started is to read the License file from the CD. Once this is completed, the Main Menu will be displayed. Open an initial database by clicking File / Open / New, type in a database name and click Open. You may remove the CD and you will not need it again unless you need to re-install for some reason.
Installing TEAM MANAGER using Web Delivery
When ordering HY-TEK's TEAM MANAGER, you can elect to have Web Delivery of the software. What this means is that you will download the setup.exe for installing TEAM MANAGER from the HY-TEK Sports Software web site. This is the same setup.exe that you would receive on a HY-TEK CD. You will receive an Email that details the steps to accomplish the installation.
If your license name was Racers Track Club for example, you would receive an Email describing the steps for the Web Delivery.
The Email would have a link that said Click Here to download the required setup.exe. Then you would do the following:
| 1. | Upon clicking the link, you can Run or Save the setup.exe file to your Desk Top or other location where you can find it. Note: Should you have trouble downloading the setup.exe, you can type the following into your browser: "WebDelivery/TFTM4-1/setup.exe |
| 2. | After the setup.exe is downloaded, you Open the downloaded setup.exe or double click the setup.exe to start installation. |
| 3. | After the program is installed, you start TEAM MANAGER and the program will bring up a window asking whether you are installing by CD or Web Delivery. |
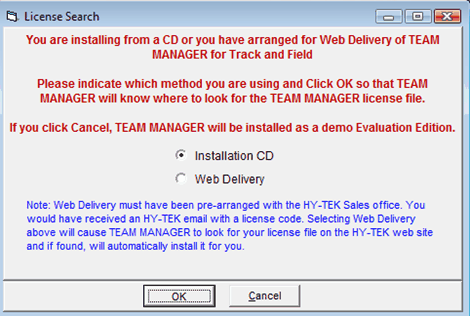
| 4. | Select Web Delivery and another window will appear asking for a code. |
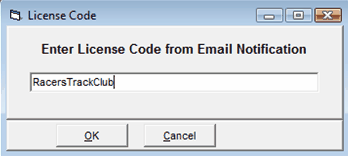
| 5. | In this example, the Email would tell you to enter this code: RacersTrackClub, and click OK. |
The HY-TEK web site would be searched for your license and if found will download and install it. At this point you would be ready to use TEAM MANAGER.
Note: Should you have trouble connecting to the HY-TEK web site, you may need to turn off your firewall.
After installation is complete, you can click Help / About at the top of the Main Menu to verify your license and options.
How to re-Install TEAM MANAGER
VERY IMPORTANT: If you receive a new TFTM 4.1 CD or wish to re-install TEAM MANAGER from your original CD, you first need to Un-Install or Remove your TFTM 4.1 software. The easiest way to do this is click on the Windows Start button then Control Panel then Add/Remove Programs. Find TEAM MANAGER 4.1 in the list and click on the Remove button. Or, you can continue as described below and choose Remove from the Program Maintenance screen.
After Windows has completed removing TFTM 4.1, then place your TFTM 4.1 CD in your CD drive. From your Windows desktop, click on Start and then Run and key in the CD drive letter and then "setup". For example if your CD is Disk Drive D, enter D:Setup. Windows Installer will check to see if TEAM MANAGER is already installed on your computer. If it is, the following screen will be displayed..
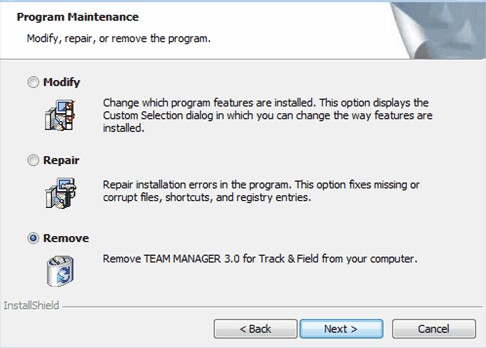
Choose the Remove option to first remove TFTM 4.1 from your computer. After Windows has completed removing TFTM, then restart the installation process by going to your Windows desktop, click on Start and then Run and key in the CD drive letter and then "setup". For example if your CD is Disk Drive D, enter D:Setup.
NOTE: If you receive a 2nd CD with new options included that you ordered, those new options will NOT be installed unless you first go through the Remove TFTM 4.1 process described above.
How to Setup a Desktop Icon or Shortcut
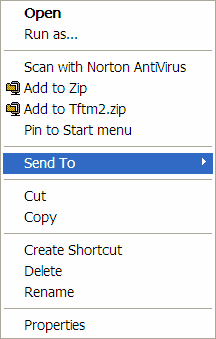
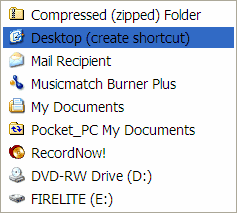
When you install TEAM MANAGER, the installation process automatically sets up a TM 4.1 icon on your desktop as a shortcut . But if you install a 2nd version of TM 4.1 that is licensed to another team that you are supporting, or the installation process failed to set up an icon due to various Windows settings, you may want to set up a desktop icon shortcut yourself. To set up a TM icon on your desktop, start Windows Explorer, pick the installation directory (the default is c:\Hy-Sport\TFTM4-1), find the TFTM4-1.exe file and right mouse click and chose Send To then Desktop (Create Shortcut) as shown below. Then you can right mouse on the desktop icon, choose Rename and name the shortcut anything you wish.
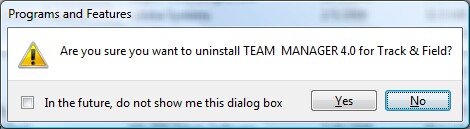
Uninstall TEAM MANAGER
To uninstall TEAM MANAGER, please use the standard Windows Add or Remove Programs feature included with your Microsoft Windows product. For most Windows releases, click on Start, Control Panel, and then click on Add or Remove Programs.
For Windows Vista, click on Start, Control Panel, and then click on Programs and Features. Find the TFTM 4.1 icon and click on it