Create a New Active.com Account
Before you can set up Online Registration in TEAM MANAGER, you must first create an Active.com account. An Active.com account allows you to access Active Network products and services with a single username and password.

When you install TM or use the License Management feature to switch to a different license, you will be given the opportunity to set up an Active.com account for that License name. Please note that you must set up an Active.com account for each TM License. If you are managing two team licenses on your desktop, then you will be asked to set up different Active.com accounts, one for each TM License. If you decline to set up an Active Account when you are so prompted, anytime you want to set up a meet using OME, you will be directed back to this screen to first set up your Active account.
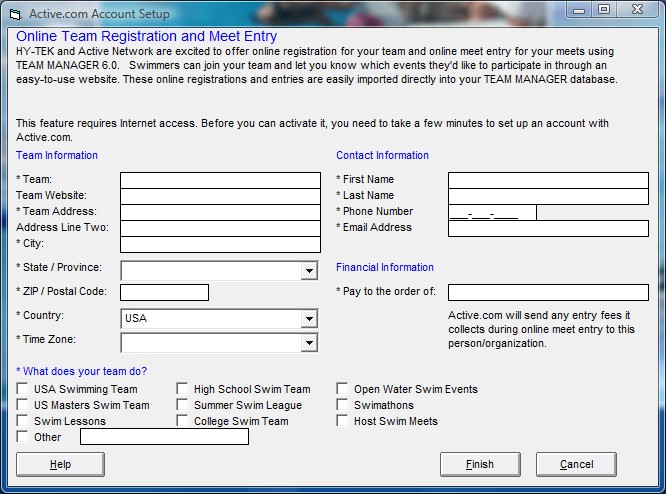
1.Enter or edit the team name. The team name field defaults to the License name of your TM software. If your license name is "FAST", for example, then you might want to change your team name to "Frederick Area Swim Team".
2.Enter the URL for your team website (optional).
3.Enter your team address.
4.Select a time zone from the pull-down list..
5.Select a default classification for your team:
•If you select USA Swimming Team, you are classified as USA Swimming Affiliated.
•If you select any other option, you are classified as non-affiliated.
6.Enter contact information for your team including your email address.
7.Enter or edit the name of the person or organization who should receive payments from Active. Checks are made payable to this name.
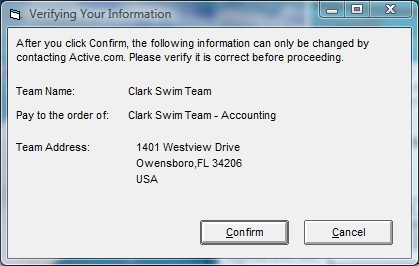
8.Click Finish. A confirmation appears.
9.Review your information and click Confirm. Your Active.com password will be emailed to you.
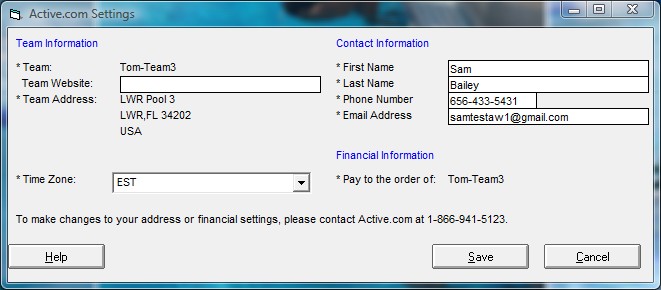
Please note that you can come back later and edit any of the fields except the following:
•Team
•Team Address
•Financial Information

To make changes to this information, please contact The Active Network directly.
Edit an Active.com Account
If you need to come back to the Active.com account and make a change, just click on Set-up from the Main menu then Active.com Settings and make the appropriate changes. When you have completed your changes, click on the Save button.
